

Configure Polygraph as a separate Okta app integration from your Nx Cloud SAML app. The SAML setup is the same except for the single sign-on URL and audience URI. You can assign the same groups and users to both app integrations.
Set up SAML
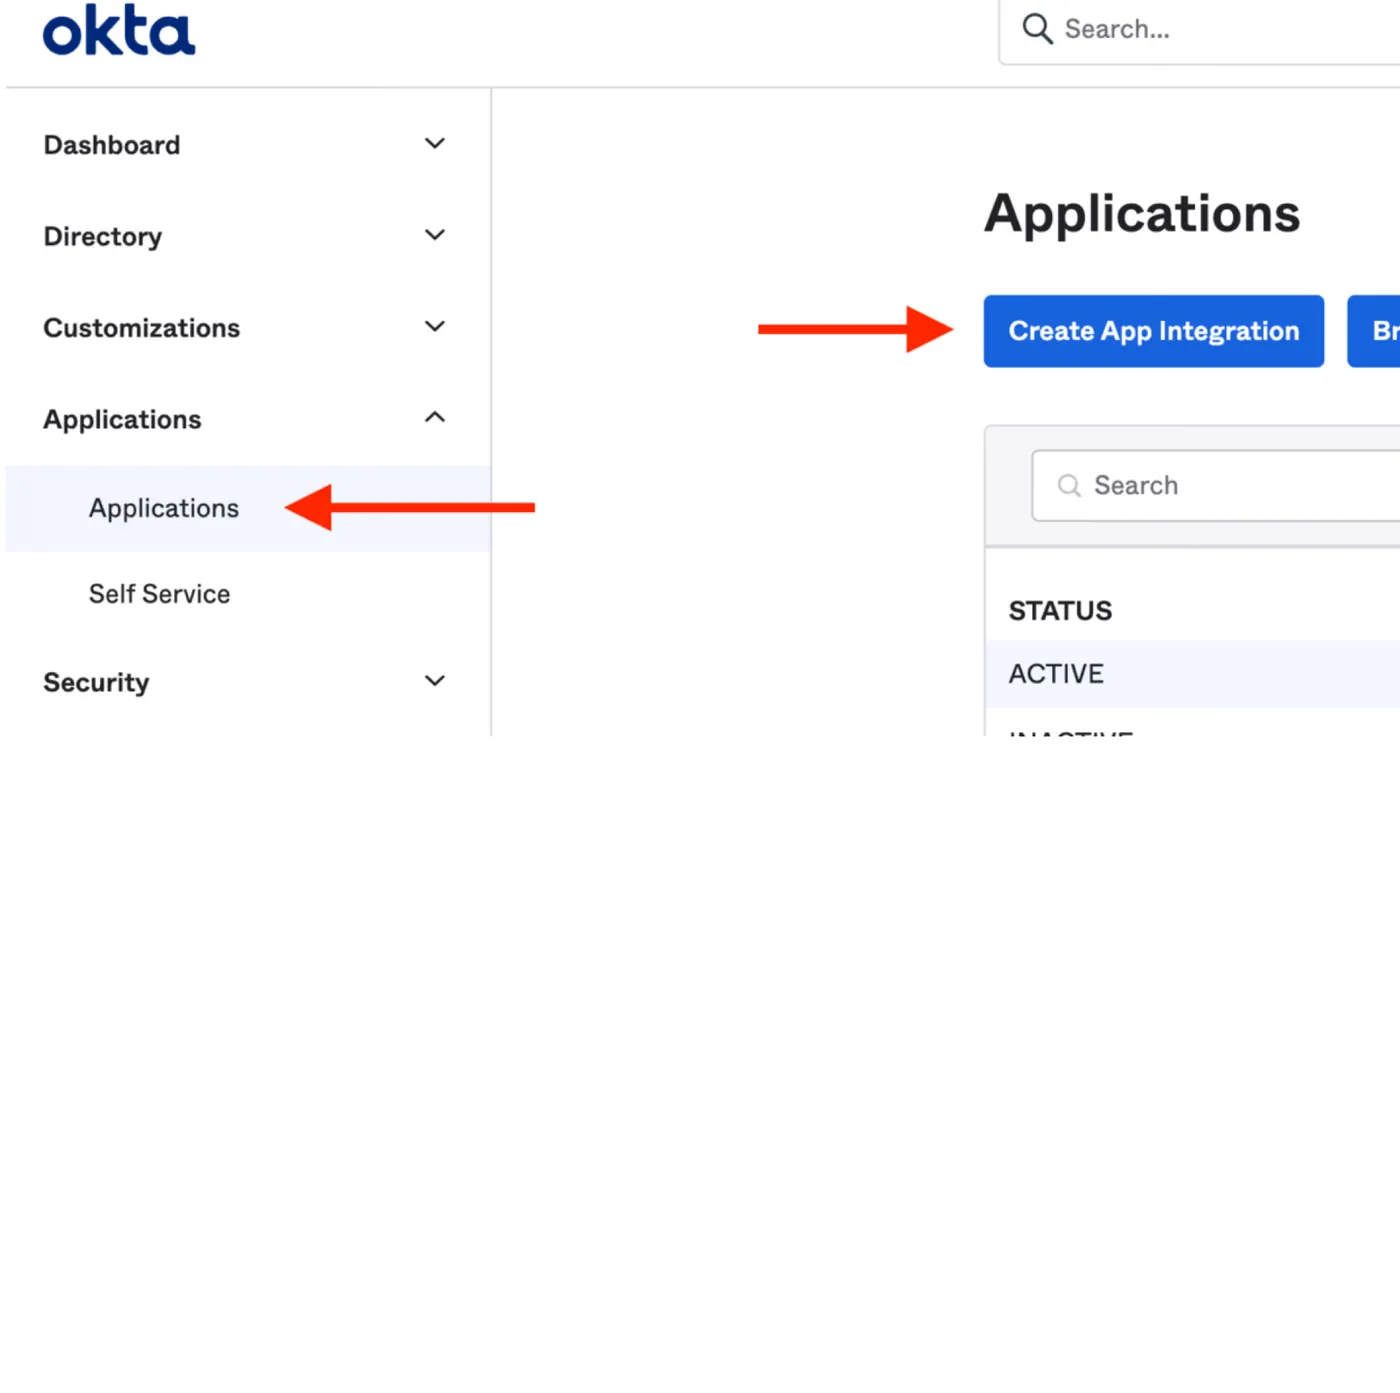
Section titled “Set up SAML”In the Okta Admin Console, go to Applications > Applications, then select Create App Integration.
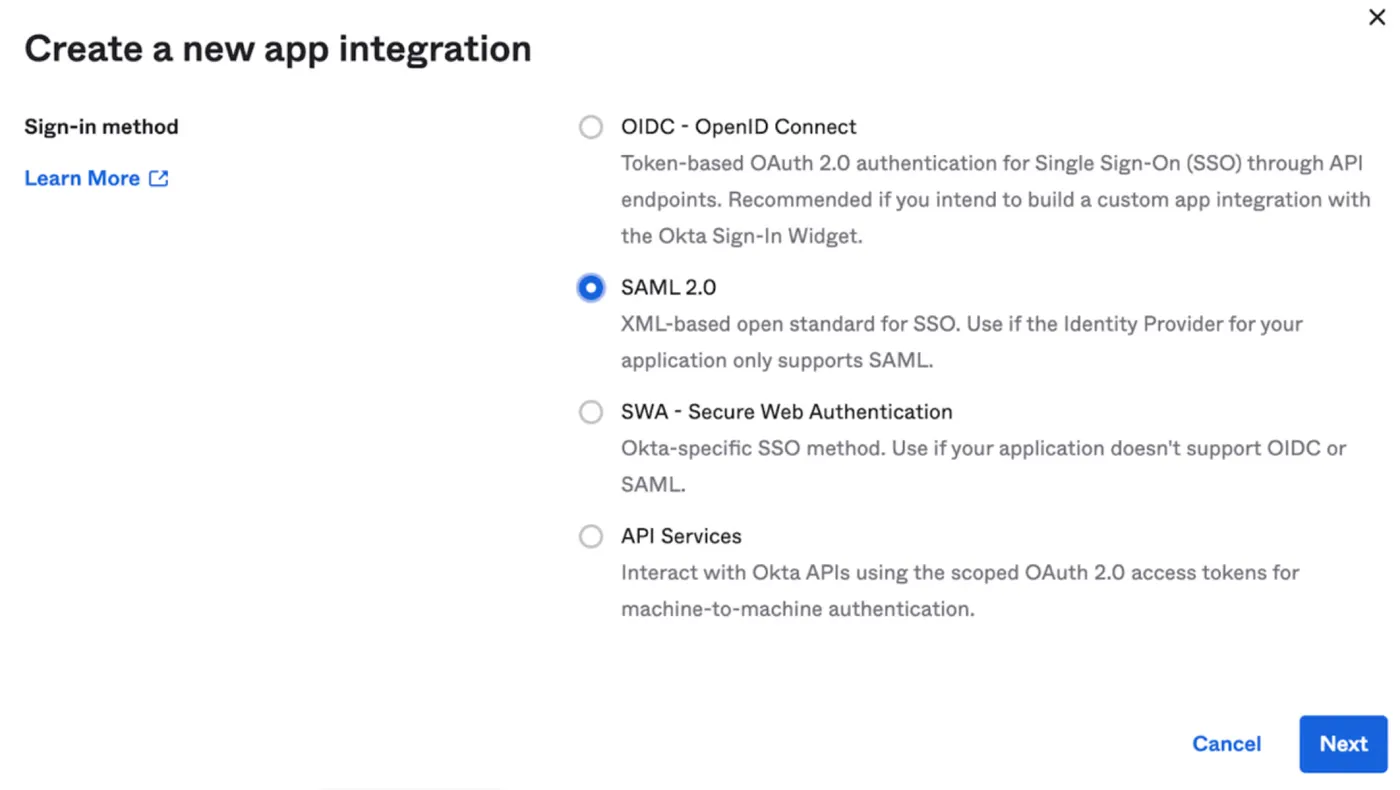
Select SAML 2.0, then select Next.
Enter a name such as
Polygraph, then select Next.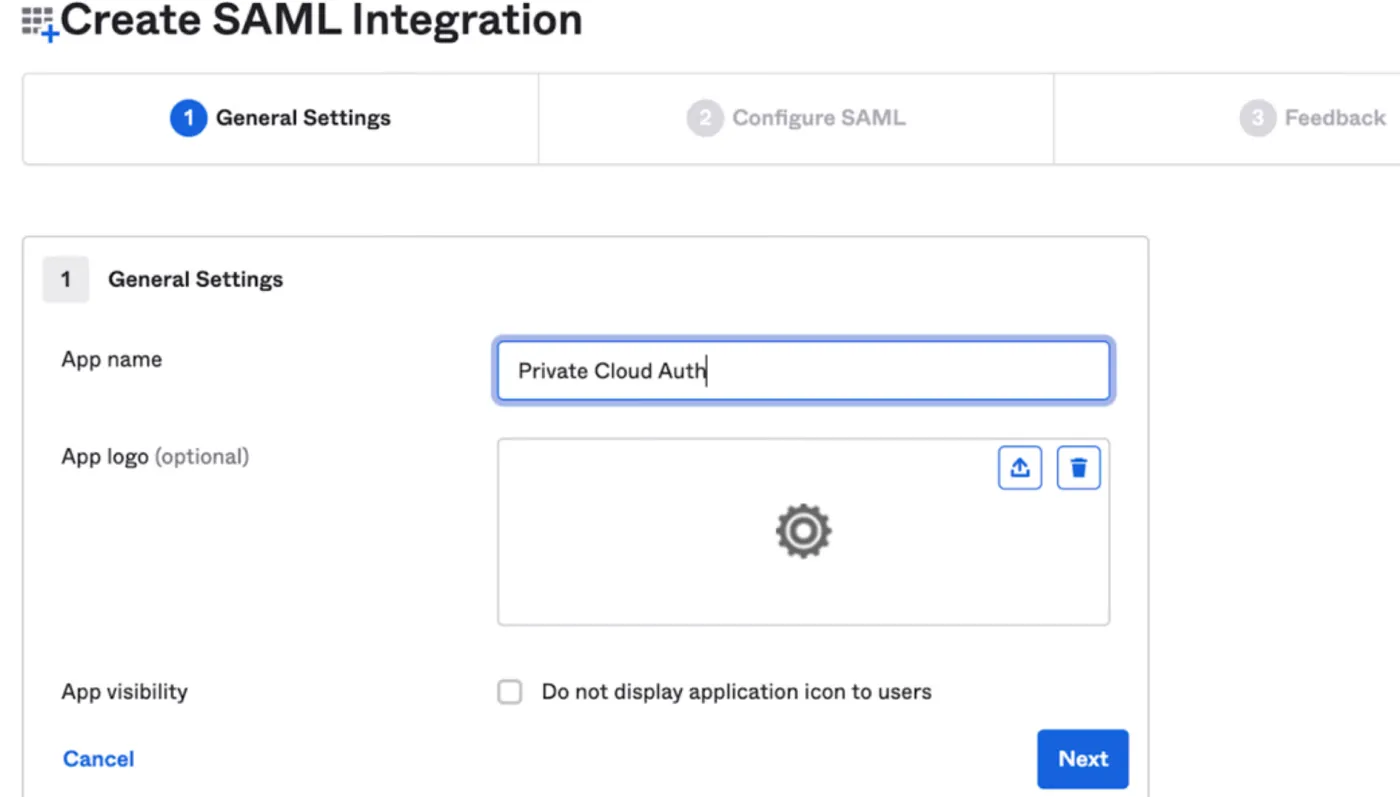
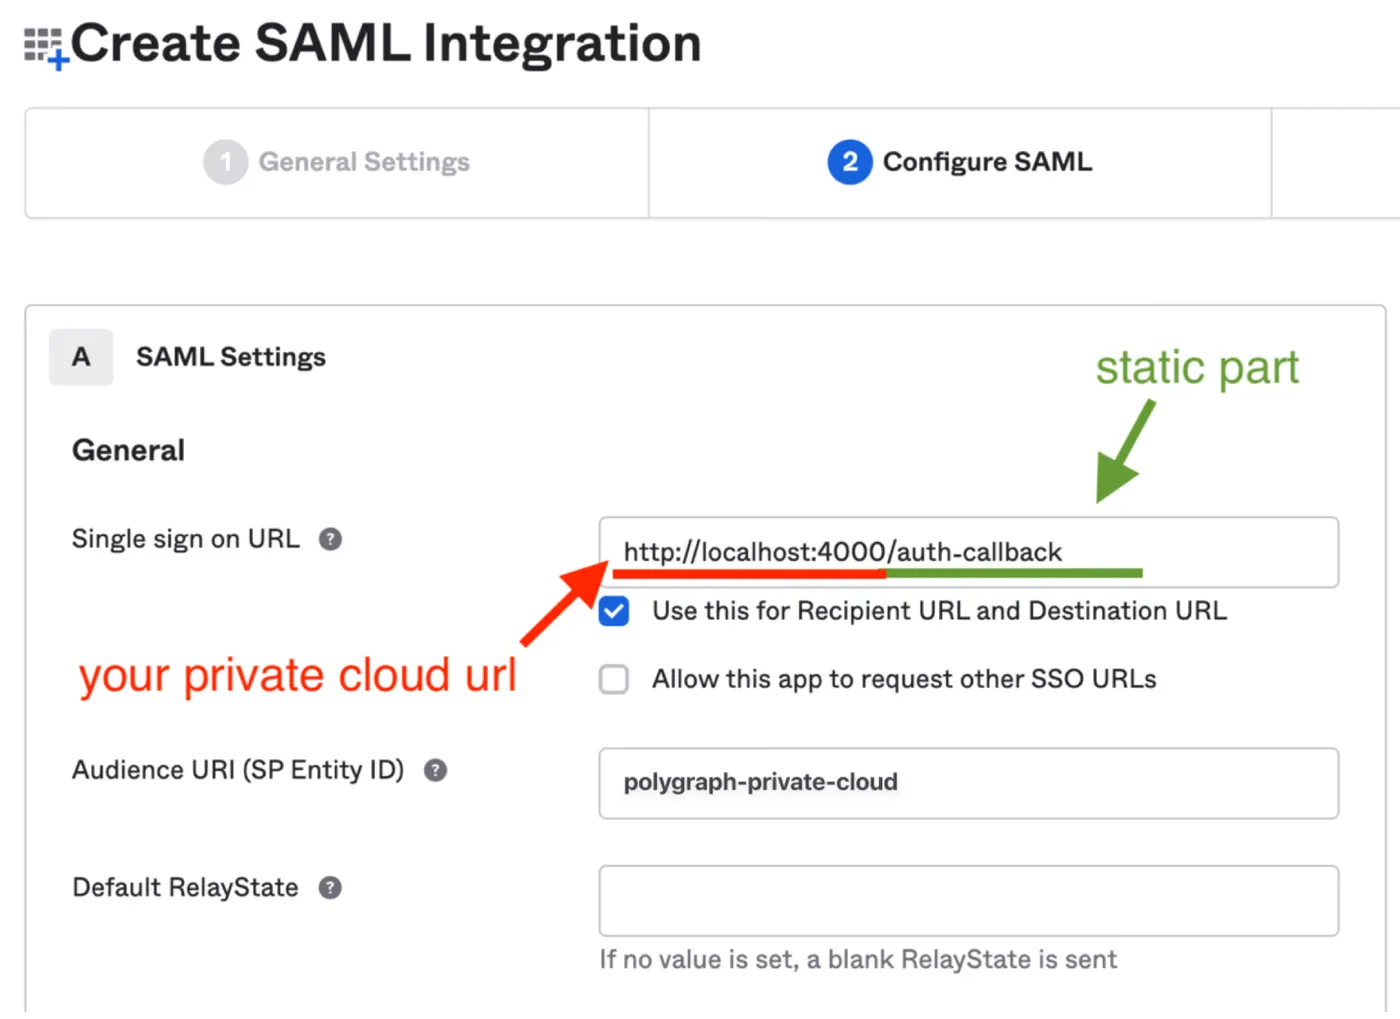
Configure the SAML settings:
- Set Single sign-on URL to
<POLYGRAPH_APP_URL>/auth-callback. Your developer productivity engineer (DPE) providesPOLYGRAPH_APP_URL. - Select Use this for Recipient URL and Destination URL.
- Set Audience URI (SP Entity ID) to
polygraph-private-cloud. - Leave Default RelayState empty.
- Set Single sign-on URL to
Under Advanced Settings, configure the signatures:
- Set Response to Signed.
- Set Assertion Signature to Signed.
- Set Signature Algorithm to RSA-SHA256.
- Set Digest Algorithm to SHA256.
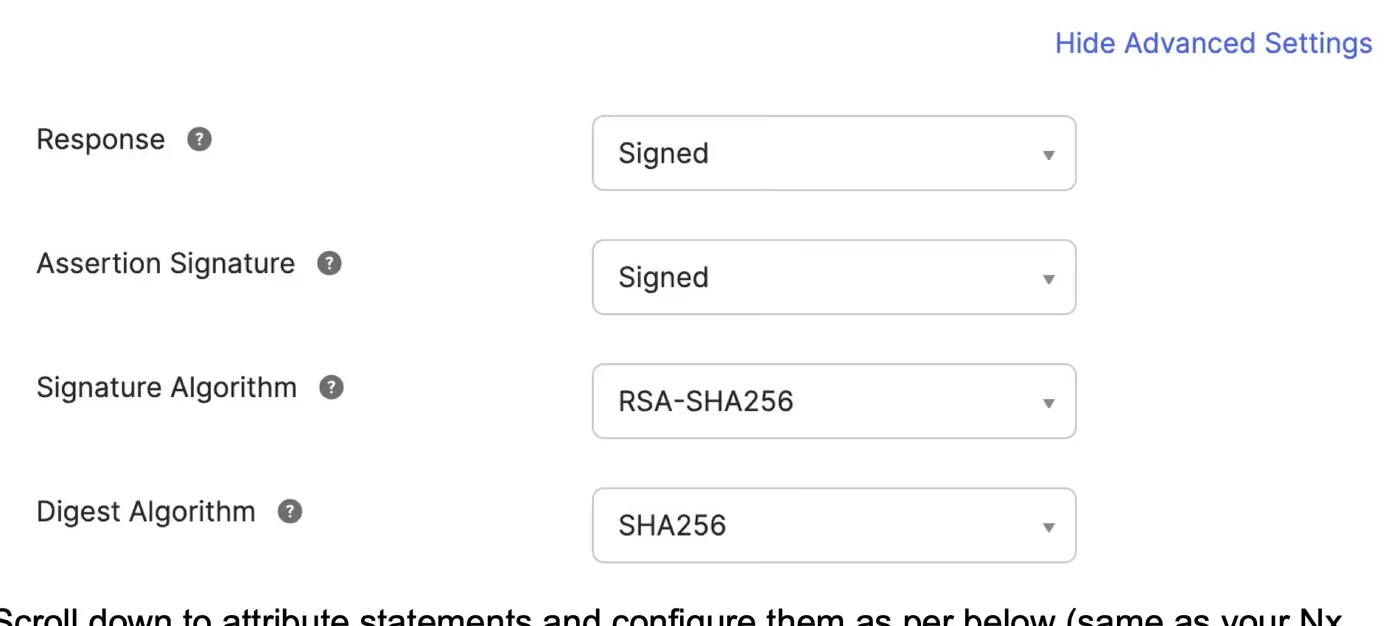
Under Attribute Statements, add these attributes:
Name Name format Value idUnspecified user.emailemailUnspecified user.email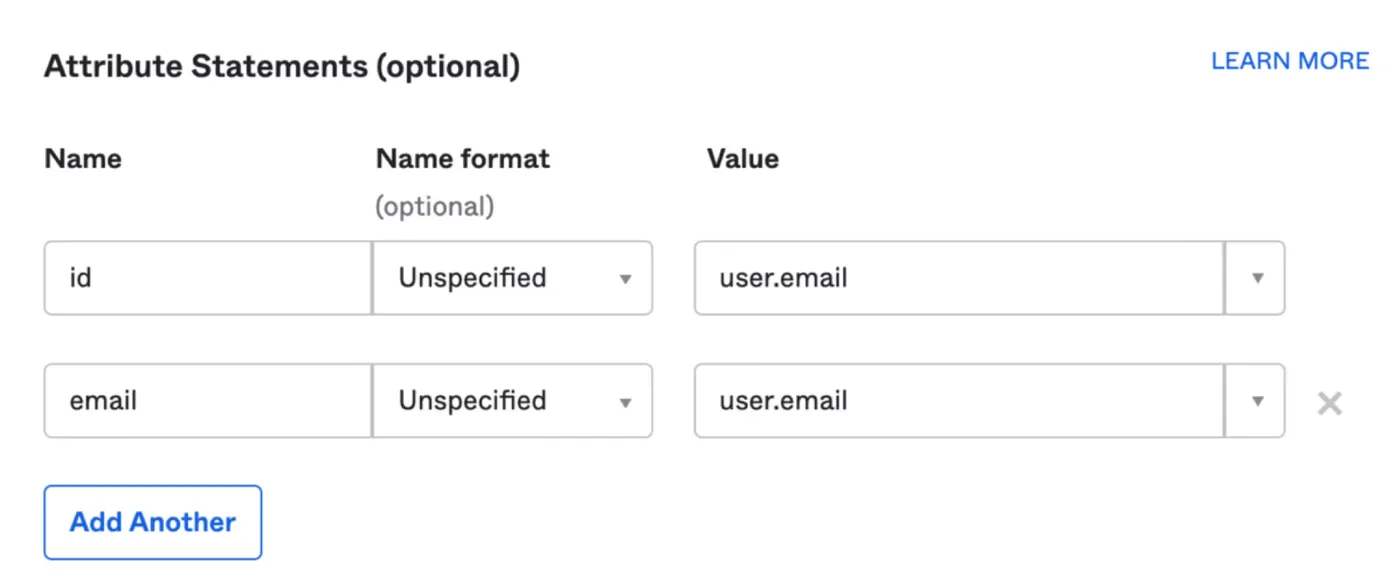
Select Next, select I'm an Okta customer adding an internal app, then select Finish.
Open the Assignments tab and assign the groups or users that can sign in to Polygraph. You can assign the same groups and users that use your Nx Cloud SAML app.
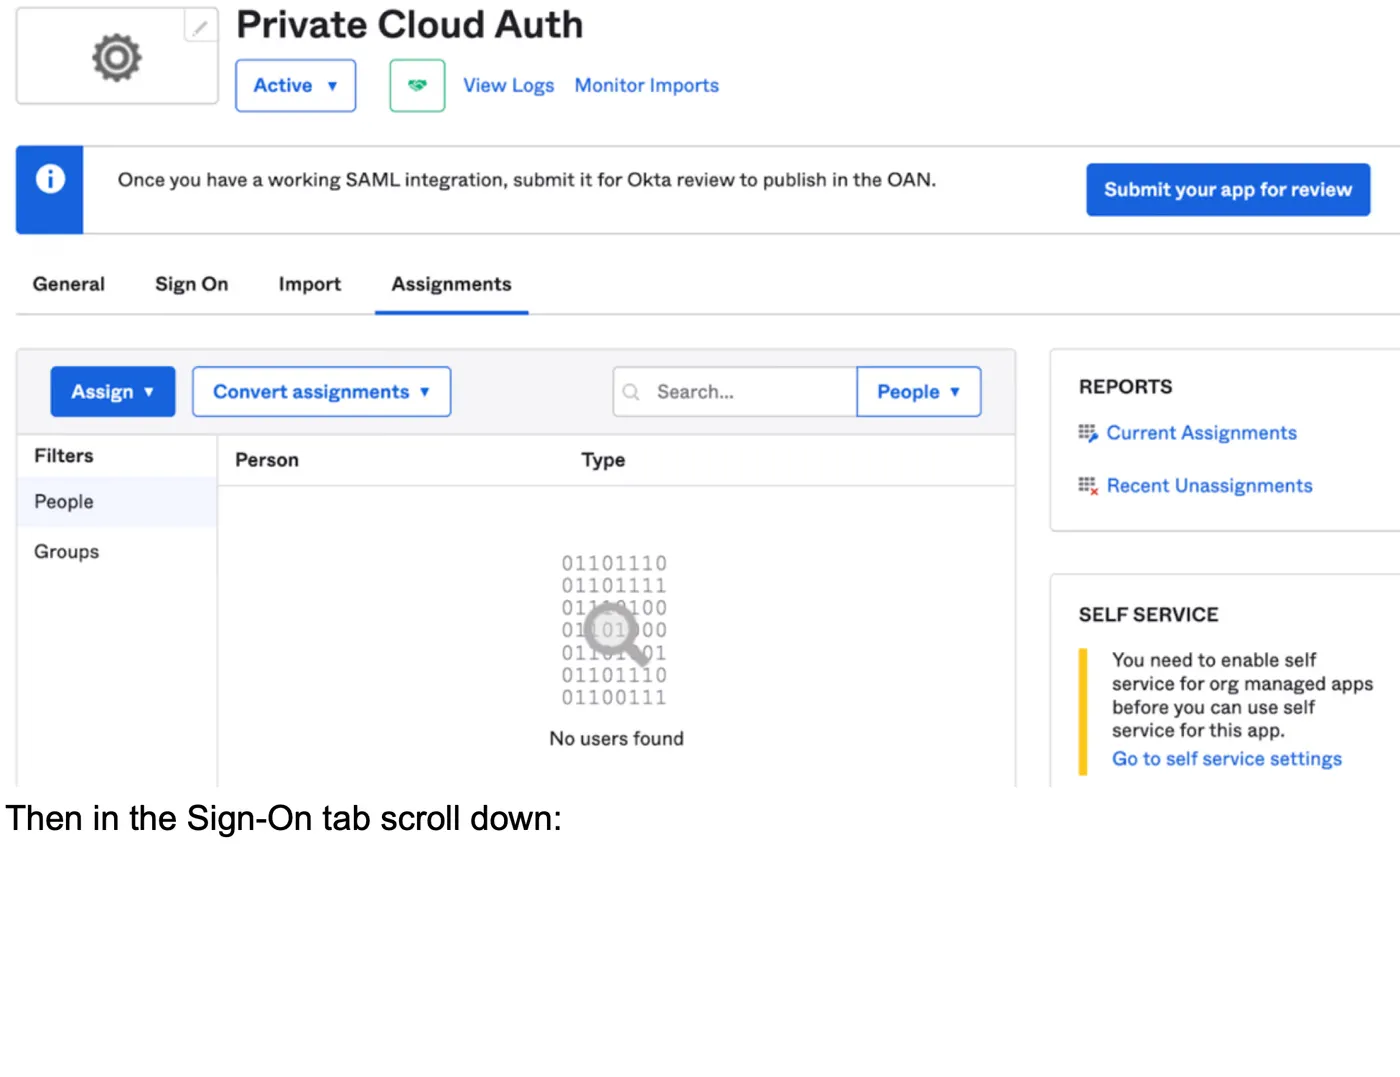
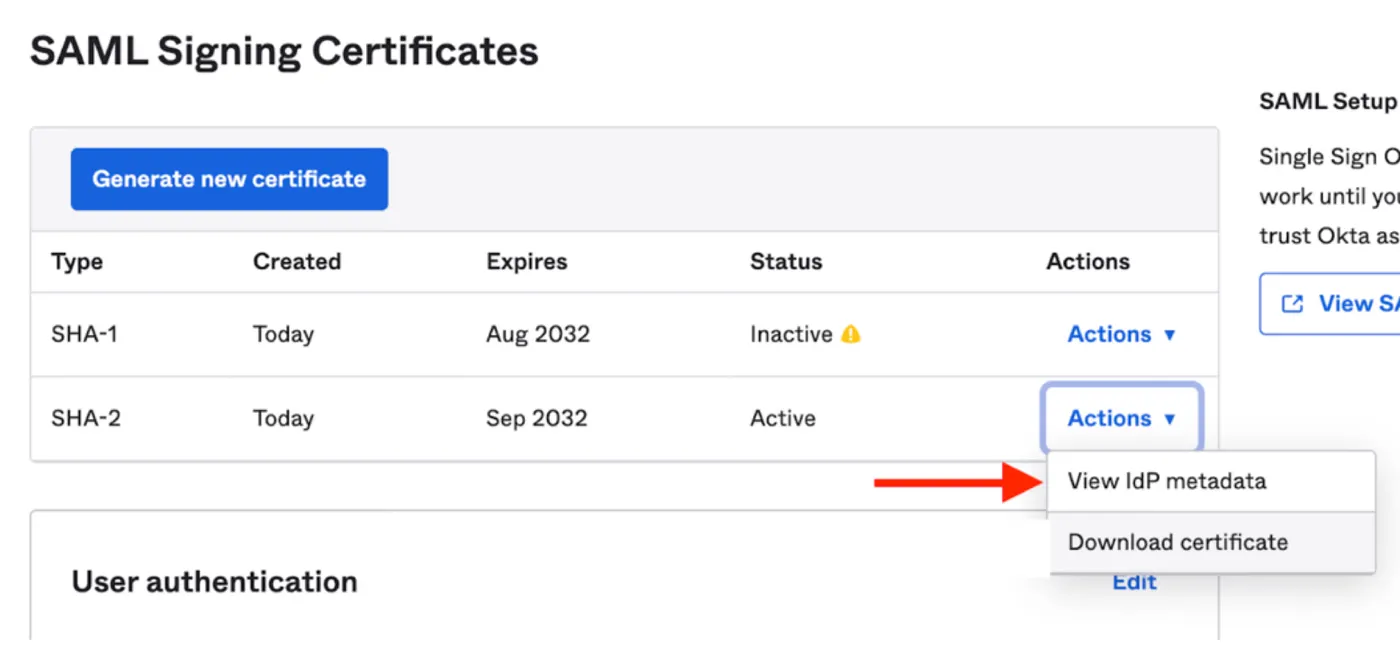
Open the Sign On tab and find SAML Signing Certificates. From the certificate with the Active status, select Actions > Download certificate.
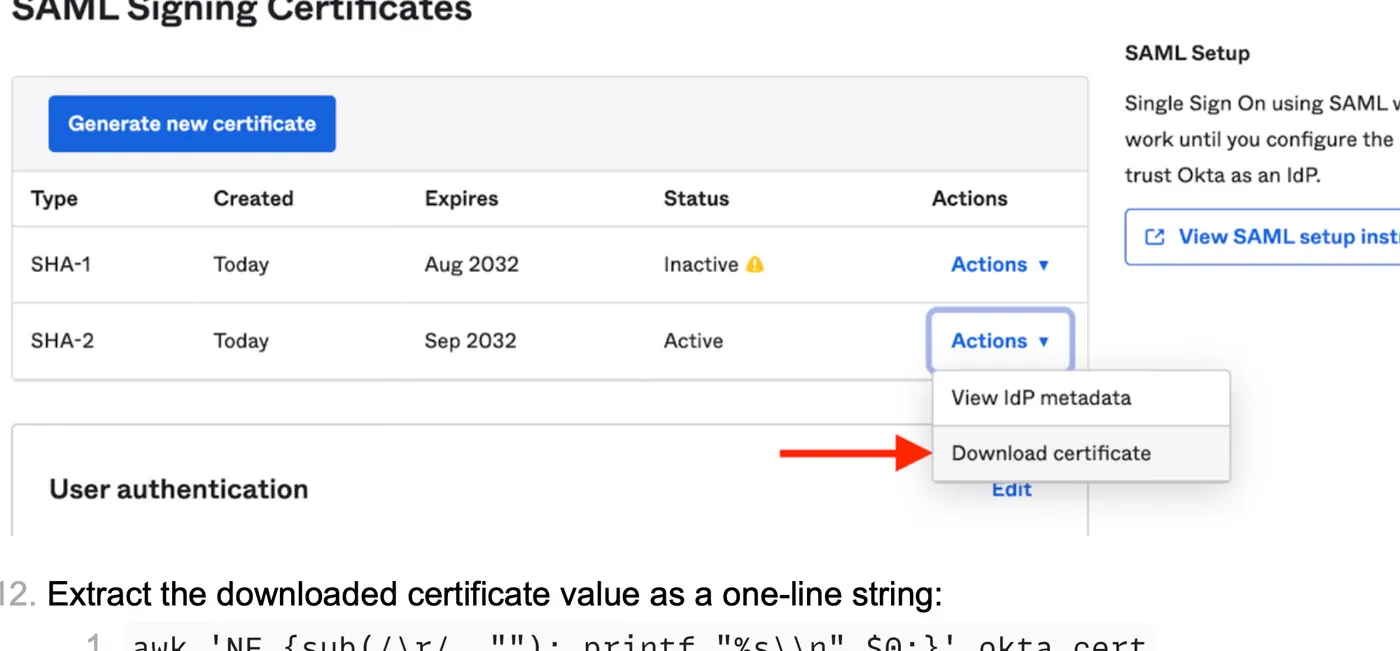
Convert the downloaded certificate into the one-line value for
POLYGRAPH_SAML_CERT:Terminal window awk 'NF {sub(/\r/, ""); printf "%s\\n",$0;}' okta.certFrom the active certificate, select Actions > View IdP metadata.
Find the
SingleSignOnServiceelement that uses the HTTP-POST binding and copy itsLocationURL. This URL is the value forPOLYGRAPH_SAML_ENTRY_POINT.<md:SingleSignOnServiceBinding="urn:oasis:names:tc:SAML:2.0:bindings:HTTP-POST"Location="https://<your-okta-domain>/app/<your-polygraph-app>/<app-id>/sso/saml"/>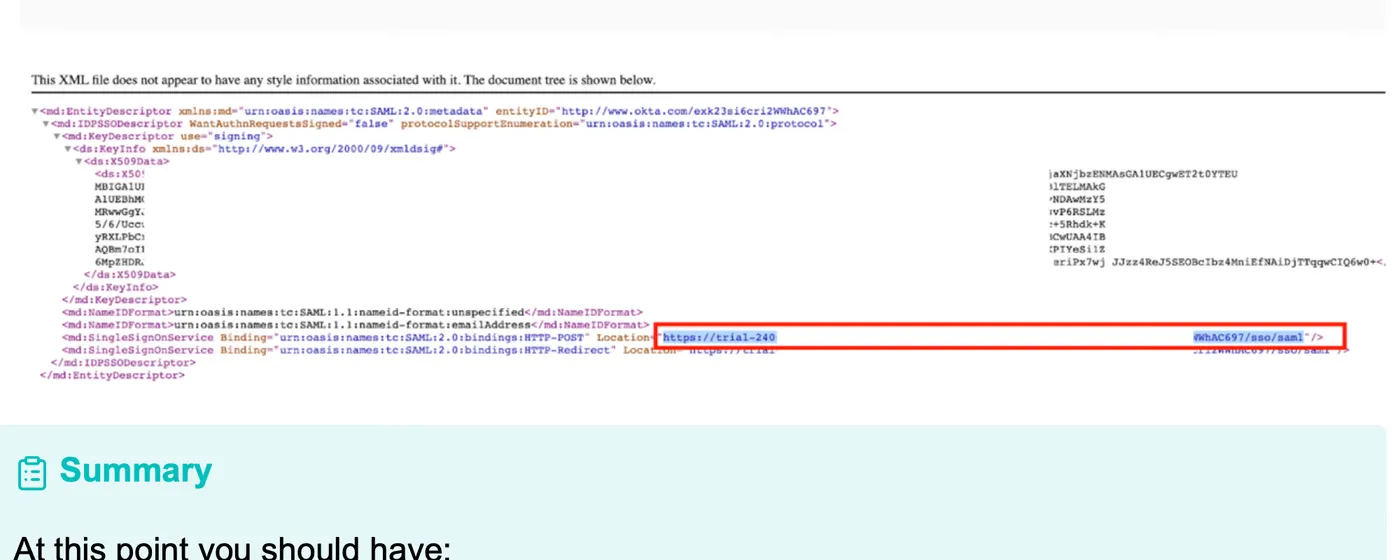
If you plan to configure Universal Logout, copy the
entityIDattribute from theEntityDescriptorelement in the IdP metadata.
Configure universal logout
Section titled “Configure universal logout”Universal Logout is optional and lets Okta revoke a user's active Polygraph sessions and credentials.
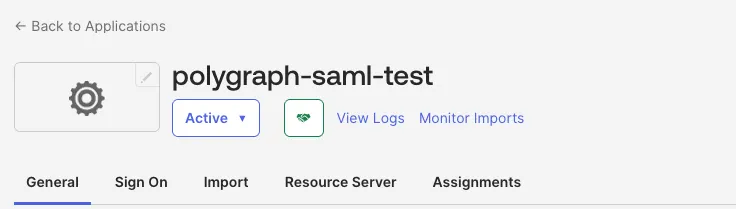
In the Okta Admin Console, go to Applications and Resources > Applications and select the Polygraph app.
Open the General tab.
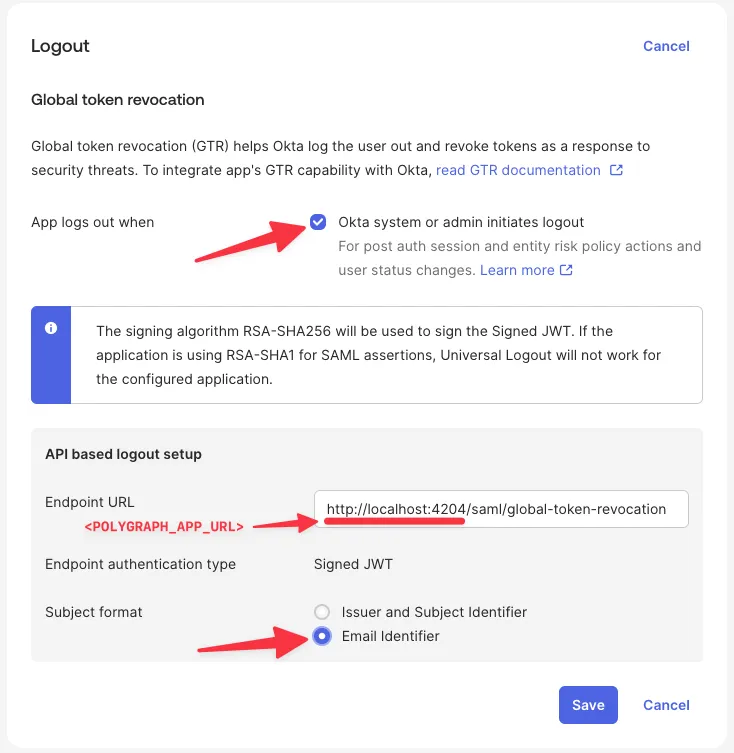
In the Logout section, select Edit.
Select Okta system or admin initiates logout.
Set Endpoint URL to
<POLYGRAPH_APP_URL>/saml/global-token-revocation.Keep Endpoint authentication type set to Signed JWT.
Set Subject format to Email Identifier.
Select Save.
Information to exchange with your DPE
Section titled “Information to exchange with your DPE”Your DPE provides the Polygraph app URL (POLYGRAPH_APP_URL) used for the single sign-on URL.
Send these values to your DPE after you configure SAML:
- SAML certificate, the one-line certificate string from the active Okta signing certificate.
- SAML entry point, the HTTP-POST
SingleSignOnServiceURL from the IdP metadata. - Okta entity ID, the
entityIDfrom theEntityDescriptorelement, if you configure Universal Logout.